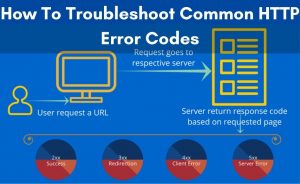
The Canonical issues as the name itself describe are one of the most common and apparent issues experienced by the users for a certain period at the time of SEO Evaluations and technical audits of websites. When there are more similar contents on your website, it becomes difficult for the search engine to determine one webpage to display. Thus, it results in great uncertainty. In such instances, users wonder how to fix canonical issue in a website.
Thus, in this article, we have come up with some of the most effective solutions to the canonical issues that occur on a website. Also, we will be giving you a short description of the canonical issue and how to fix canonical issue. Hence, we recommend you to have a look right below to get them all.
What Is A Canonical Issue?
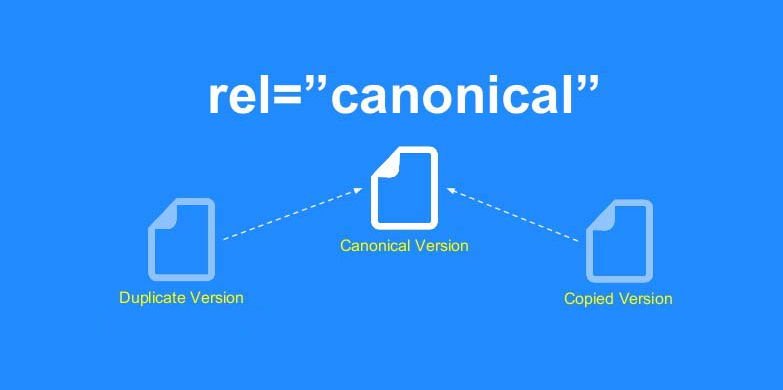
The canonical issue is considered to be the most common error which occurs when your system 301 redirects in a wrong place. Thus, your website becomes accessible to various other search engines using different URLs. So, in this state, you can find out that the search engine is now capable of indexing your website through the various URLs. This way, your website takes the appearance of a copied site filled with duplicate contents.
How to Fix Canonical Issue?
Though this error is common and easy to fix, not all of the users know the complete solutions to how to fix canonical issues in a website. You can see a lot of fixes pertaining to the canonical error that you find on your website. However, not all of them are equally good to resolve the error. Hence, you can follow some of the most believed solutions to this error. You can find them all right below.
- To begin with the process, you need to log in to your Google Webmaster.
- Then, you will require to set up two different profiles for your domain.
- Here, you need to set up one profile with the www. prefix and for the other one, you can do it without using the www. prefix.
- After that, you will require to go to the Configuration.
- Then, you can move to the Settings option.
- Next, you will require to select your preferred domain here.
- Now, you can select one domain that Google will use from now.
How To Implement A 301 Redirect With A .htaccess File?
Now that you know the process of how to fix canonical issue in a website, you can move to the next step. In this step, you will know how to implement a 310 redirect using a .htaccess file for your website. Here, in this article, we have put together some different servers. So, if your website is hosted on any of these servers, you can make use of the .htaccess file. For that, you can follow the instructions right below.
- Linux
- Apache
- Zeus
- Sun Java
So, these are some of the most recommended and regularly used hosting servers you can find. Better yet, they the process to utilize the permanent 301 redirects is easier in these hosting servers. Therefore, you can simply use the below-mentioned code in your current.htaccess file. Else, you can choose to go to a blank notepad and save the code as .htaccess.
Options +FollowSymLinks
RewriteEngine on
RewriteCond %{HTTP_HOST} ^ example.com [NC]
RewriteRule ^(.*)$ http://www.example .com/$1 [L,R=301]
RewriteCond %{REQUEST_URI} ^(.*)//(.*)$
RewriteRule . http://www.example.com%1/%2 [R=301,L]
RewriteCond %{THE_REQUEST} ^[A-Z]{3,9}\ /(([^/]+/)*)index\.html\ HTTP/
RewriteRule index\.html$ http://www.example.com/%1 [R=301,L]\
Then, you will require to alter the.COM domain name and make it your domain name or give it a preferred domain name further. Also, depending on your website, you get a .php index page. This, you can also refer to as an index. So, you can use any of these methods to keep your domain according to your convenience.
After making all the changes, you need to save the file. Here, make sure you save it to the root of the domain and then you can upload the file.
Setting Up A 301 Redirect Using Windows Server
After implementing the 301 redirect with a .htaccess file, you need to set up a 301 redirect using Windows server. So, when you decide to finally make use of the Windows server now, you will require administrative access to the hosting server here. Apart from that, you will need to have a complete set-up of the 301 redirects using the IIS. And for that, you can follow the instruction right below:
- To start with the process, you need to go to All Programs.
- Then, you can move to the Administrative Tools section.
- After that, you will require to go to the Internet Information Services option.
- Next, you can go to the domain.
- Now, you have to navigate to the Properties option.
- After that, you need to go to the Home Directory option.
- Next, you can move to the “A redirection to a URL”.
- Now, you have to provide the URL that you want to redirect to and then you can proceed with the OK button.
HTTP 301 Redirect With A .htaccess File
A 301 Permanent Redirect helps to redirect one URL to another with permanence. You can make use of the 301 redirect and send visitors to a new URL. This way, you can inform the search engine of the page that you move to the new URL and you can correctly index it. Moreover, we are providing you with some of the most common uses of a 301 redirect that will make it easier for you to understand the whole point. You can find them all listed below.
Some General Uses Of A 301 Redirect
There is a lot of usage of 301 redirect. Apart from sending the website visitors to a new URL, there is more that you should know about. So, you can have a look at them right here.
- The very first use of 310 redirect is to move a visitor to the new domain. Therefore, you can use the 301 redirects on the older domain so that they can make way to the latest site.
- Apart from that, when you complete sending the visitors to the new structure site, you can use the 301 redirect to move users to the newly creates web pages.
- Also, when you finish joining two different sites, you can make use of the 301 redirect to make sure that the current visitors of your domain move to the new pages.
Therefore, with the help of the HostPapa sites, you can use the .htaccess files with ease. Also, it allows you to generate and manage redirects. Better yet, you won’t get any complications while creating a .htaccess file by practicing the File Manager in the cPanel in your computer system. Besides, you can do it through the FTP and upload a .htaccess file that you just create. Also, you can edit it by using the text editor on your device.
Here, you have to make sure that you hide the file. Therefore, it will be easier for you to decide and you can configure the cPanel File Manager. Also, we have put together the instructions that will help you to do it easily. Here, note that you might get the site not working properly. In that case, you can add or even update the .htaccess file on your system and restore site performance. You can do it either by entering the altered name or you can choose to delete the file as well.
Code You Need To Redirect To A Page
Here is the code that you will require to redirect to a page. You can follow all these instructions before you start off with the redirect page.
This is the line that you need to follow into your .htaccess file:
RedirectPermanent http://www.domain.com/old-file.html http://www.domain.com/new-file.html
After that, make sure you repeat this for every page that you want to redirect to.
Code To Redirect To A New Domain
This is the line that you need to place into your .htaccess file.
RedirectPermanent / http://www.new-domain.com/
How To Implement A .htaccess File Using The cPanel File Manager?
Now that you know the different codes to redirect to a new domain, you can move to implement a .htaccess file with the help of cPanel File Manager. The cPanel File Manager is considered to be the best source of providing the users with simple ways to generate or deliver access to a .htaccess file. You can see right below how it works.
- First of all, you need to go to your Hostpapa cPanel. Then, you can move to the Files section. You can find it in the cPanel itself.
- Now, you need to select the File Manager option. Under the File Manager option, you need to open a new tab. Then, you can tap on the Settings option. You can find it in the uppermost area of your screen.
- Next, you can move to the Preferences tab. Here, you will require to choose the Show Hidden Files option. You will get the option in the checkbox. Then, make sure that you click on the Save button to retain all the changes.
- After that, you need to go to the File Manager window. Here, you can see all the file that was hidden before. Now, tap on the Files option and then you can move to the public_html option.
- Under the public_html section, you can see all the folders appearing on the screen. And one of them includes the .htaccess file. Now for the new site, you won’t get the .htaccess available already. Therefore, you will require to create one for you now.
- For that, you can select the +File option and go to the New File option. Here, you need to type the filename as .htaccess and then you can proceed with the Create New File option.
- Now, you will get the .htaccess option appearing at the top of the list. Here, you have to select the .htaccess file and then you can select the Edit option.
- Now, for the Text editor section, you will require to add utf-8 and then you can proceed with the Edit option. After that, you will get a completely blank tab and you need to enter the new file here.
- You can provide the page or the domain name redirect code.
- After the completion of the editing process of .htaccess, make sure that you click on the Save Changes button.
Therefore, with this, we have come to the end of the process of how to fix canonical issue in a website. This is considered to be the most effective solution to the canonical issue. Also, there are some other factors that you should know about. So, you can find them all in this article. Hence, we recommend you implement all of these methods to fix the canonical issues with ease.